
Location: Sankri, Uttarkashi District, Uttarakhand, India
Altitude: 3810m (12500 ft)
Difficulty Level: Easy-Moderate
Trek Distance: 25 KM
Trek Time: 4 Days

The Best Time To Trek
Winter is the best time to do the Kedarkantha trek. It is when the surroundings turn white that the views are spectacular. The ideal time to trek therefore is anytime between Mid December to February. During the last week of December, the trek attracts close to 4000 trekkers. Therefore, it would be advisable to avoid that week, if possible.
Things to Keep In Mind
Two things to keep in mind before planning your trek to Kedarkantha is - The crowd and the cold.
The Crowd
Due to its popularity, Kedarkantha can get extremely crowded at times. During the last week of December, around Christmas and New year, Kedarkantha trek witnesses close to 4000 trekkers every day. The trail gets busy and the climb to peak on the third day gets slower due to limited space along the steep path. However, the Basecamps are spread across the area and therefore, you will get your share of privacy while camping. A good guide can also help you get to the summit on time despite the traffic.
The Cold
The temperature goes as low as -10 Degree Celsius. So, be prepared for the extreme weather. The evenings and nights get extremely cold and unbearable if you do not have adequate clothing. Do not expect everything to be rosy as in Instagram reels. Take your time and prepare mentally for this situation.
Planning Your Trek
Pick The Right Organiser
It is very important to book this trek with a good organiser, specially if it is your first. There are so many trek organisers these days that it would be a difficult task to pick one. Many offer this trek at a much lower price but you might end up in a group of 30-40 trekkers and carless organising. Here are the things to make sure when you choose your organiser -
- Maximum number of trekkers in a group - 15.
- Number of guides - 2 guides if there are more than 8 people (Very important to manage slow climbers)
- Who are your guides - I personally prefer if local experts are your guides even though the trek is arranged by some established organisers. The local guides are much more informative and lenient. Trek leads from the organisers can sometimes be a nuisance.
- Food arrangements - Generally most treks have a moving camp with a cook and the helping staff.
- Safety measures taken - Insurance / Medical attention etc.
Here are my pick of some of the good organisers for this trek -
Book Your Transport
Normally, Dehradun is a meeting point for this trek. Most people take flights or trains to the city. Book your tickets well in advance during peak seasons. The railway station is generally the meeting point. There are trains to Dehradun from all major cities in India. If you take a flight, the airport is situated about 26 km from the town centre. Find the details on local transport in the next segment.
Buy Or Rent The Necessary Gears
As this is a winter trek, you will need to be prepared with certain special gears. Checkout my main post on List of things to carry on a trek for more information on this. Make sure to go through the Winter trek requirements in particular, along with the musts.
Necessary Documents For Permission
You will need to carry a few documents to get permission from the forest department. The organisers will guide you on this and will handle the process. You will need to carry a copy of your photo ID (Adhaar Card), a medical certificate ensuring your fitness for the high altitude trek and other documents as requested by your organiser.
Stay In Dehradun
To reach the base village Sankri, you have to first reach Dehradun, the winter capital of Uttarakhand state. You can take a train from Delhi, Mumbai or other major cities in India. The railway station is normally the pickup point for all trekkers moving to the base village.
You can also choose to fly directly to Jolly Grant airport in Dehradun. The airport is around 26 km from the city centre. The best option is to take a taxi at the airport. The taxi charge is around Rs 800. Make sure to step out of the airport to book your taxi. The counters inside the airport are expensive. While you are waiting for your taxi, team up with other trekkers to share your ride. Since many are either going to Rishikesh or Dehradun, you will find others who might be willing to share the ride.
If you want to take the local transport, you will have to walk to the main road which is around 2km away from the airport. Here, you will find buses or shared auto that will take you to the city.
There are not many hostels in Dehradun yet. Among the options that are available, Nomads Backpacker hostel is the best you can find. Book them in advance as it gets filled fast during the peak season. There are plenty of lodges around Dehradun railway station. It is not even required to book.
How To Reach Sankri?
Sankri is a small village in the Uttarkashi district of Uttarakhand. It is located around 200km from Dehradun. Normally the trek organisers will arrange a transport from Dehradun to Sankri. Sometimes it is included in the trek fee, but, most often it is not and has to be paid directly to the driver. It accounts to around Rs 800-1200 per person for a group of 6-8 people.
If you choose to reach Sankri on your own, then you will have to catch a bus from Dehradun ISBT bus station and take a direct bus to Sankri. There are about 3-4 buses that ply between Dehradun and Sankri and they leave between 6AM-8:00AM. The journey takes you around 10 Hours. During peak seasons, the buses get filled almost quickly. If you do not find a direct bus to Sankri, you can take a private bus to Purol and from there, another to Sankri.
The Trail
The entire trail is 25km long and begins at the village of Sankri (1950mt/6400ft) in Uttarkashi district of Uttarakhand. Here are the details about this 4-day trek.
Day01 - Sankri to Juda Ka Talab (5km, 4/5H)
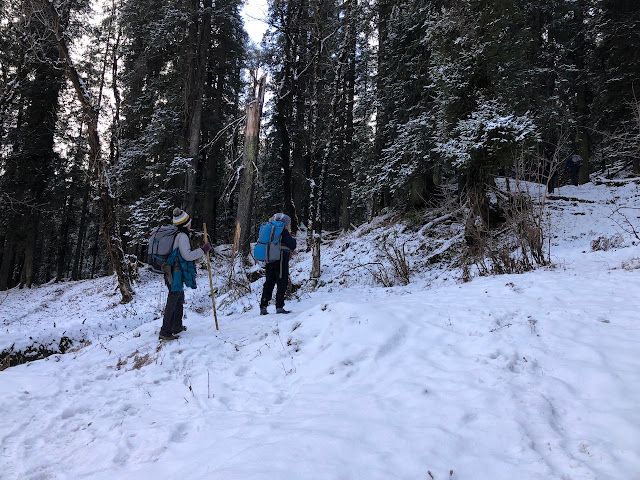
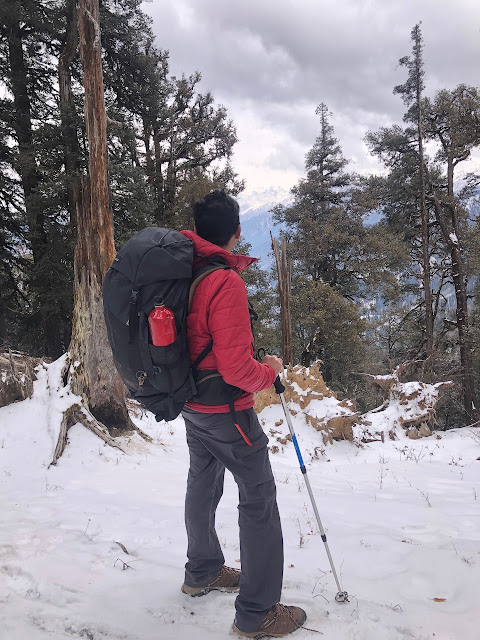
The first stretch is moderately difficult. The climb itself is not that steep but the melting snow makes this climb difficult. Be careful with the slippery trail, do not rush! You will have enough time to reach the camp. There are a few Dhabas setup by the villagers along the way. You can stop for Maggie, bread-omelet and tea if you like. The views get amazing as you climb higher. On this day, you are still in the forest and not completely above the tree line. The camping site can be anywhere around Juda ka talab, depending on the crowd on that day. Some camp very close to the lake, some camp a kilometre before the lake, to avoid the crowd.
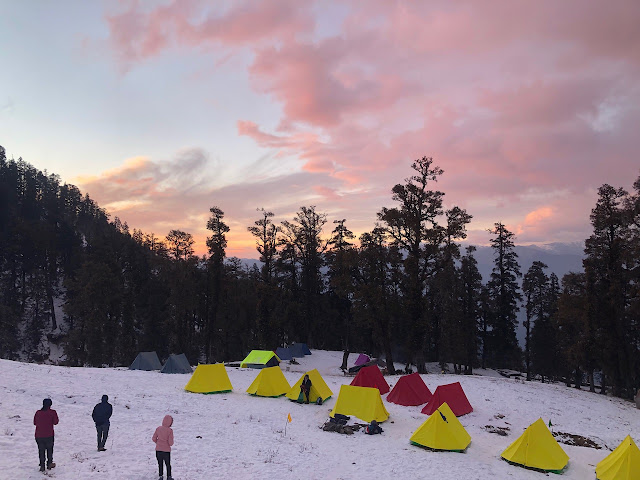
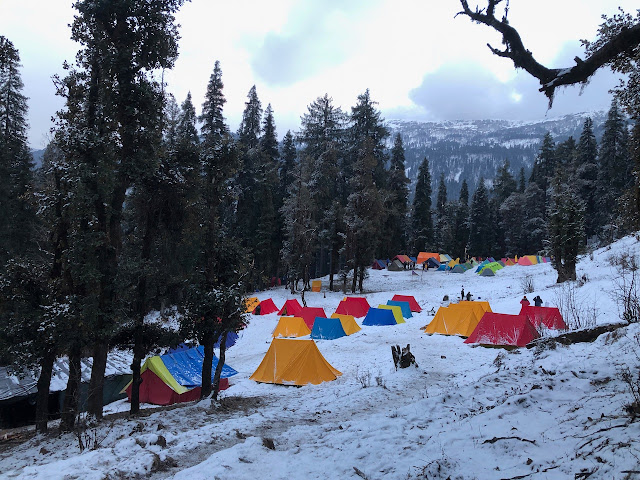
Day02 - Juda Ka Talab to Kedarkantha Base camp (5KM, 3/4H)

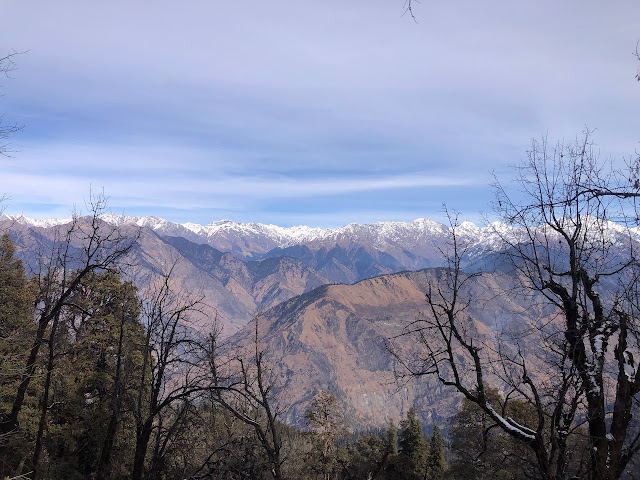
This second stretch is a fairly easy trek except for a slippery climb in the beginning. The trail continues through the forest and reaches Kedarkantha basecamp which is located at a beautiful open area surrounded by great views. Enjoy the view of the mountains on one side and the forest on the other. Kedarkantha peak is also seen from the campsite.
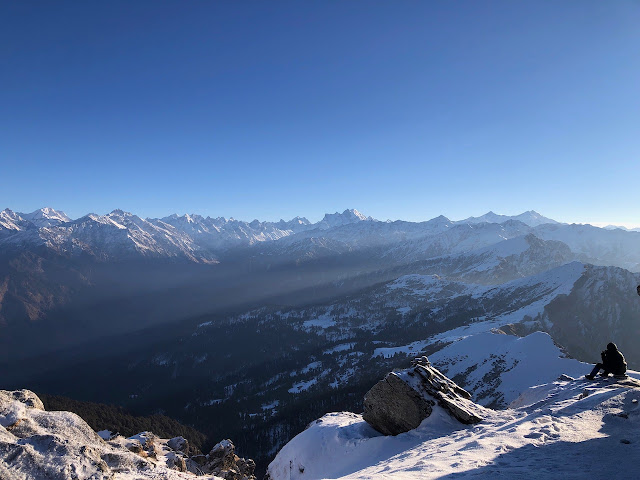
Day03 - Kedarkantha Basecamp to Peak and back (7KM, 5-6H)
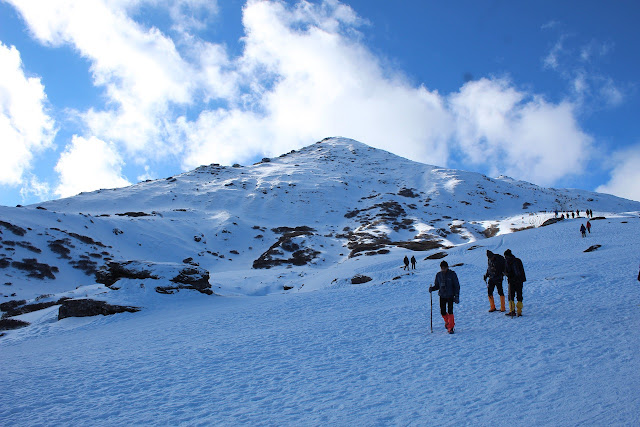
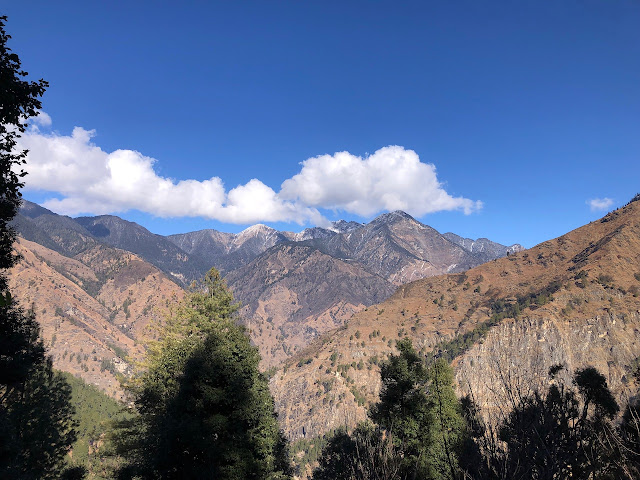
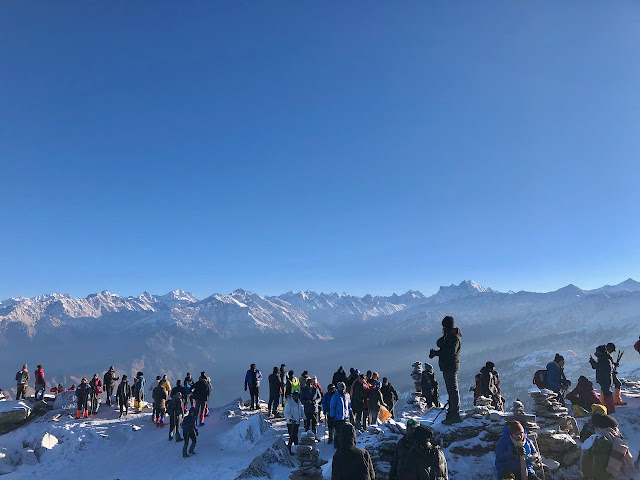
This day involves, hike to the peak and back. The hike to the summit begins at around 3AM as one needs to reach the summit before sunrise. The climb is steep and challenging, specially during winter. Gaiters and spikes are generally provided by the organisers. You will need spikes to trek here. If there is a huge crowd, then the climb to summit can get slower. But there is enough space for everyone at the summit. The brilliant views of the surrounding mountains will make this trip worthwhile. Some choose to return to Juda ka talab on the same day.
Day04 - Kedarkantha Basecamp to Sankri (8KM, 5-6H)
The last day involves a trek back to Sankri which may not be very interesting. There is a slightly different route that leads to Sankri market but depending on the weather and snowfall, the guides may take that route or choose the route you took while climbing up. Most of this stretch isn’t that exciting as it would be a repeat. But the feeling of having conquered a peak, will keep you alighted thought this last walk as you encourage the fresh batch of trekkers climbing up and who are eager to know your experience. The climb down is fairly easy but again, the melting snow can make it risky. Be extra careful on slippery trails while descending.
My Experience

I scaled Kedarkantha peak in December 2021 during the most crowded times (Dec 26th-31st). There were about 3000 trekkers on that day. This was my second trek with Himalaya trekkers and I like the way they plan and execute the treks. We had two local experts guiding the 9 of us. One of the guides stayed with the fast climbers and the second remained with the slow climbers. This is important, because you could see big groups breaking apart and loosing way. Slow trekkers from other groups found themselves alone at times and enquired people about the location of their basecamp. In this crowd, finding your basecamp can get difficult if you miss your guide and team. With smaller groups and two guides, it is much easier.
On almost every day, there was a snowfall in the evening. It was terribly cold and I wondered if I could manage the early morning sunrise trek to the peak. But, surprisingly the cold wind had subsided by morning and I enjoyed my trek to the peak. Thanks to our guide, who despite the crowd, took us off route to reach the peak on time. Needless to say, that the view from the peak was mesmerising.
The entire descent from Kedarkantha peak to basecamp was filled with spectacular views of the Himalayan range. You can choose to slide your way down if you like. With an energetic team and good guides, a trek can be amazing. The details of my trek can be read on my personal blog - Kedarkantha trek.
My Film On Kedarkantha Trek -


This is such a detailed and informative description that will be so useful for anyone wanting to trek. Enjoyed reading your account. Glad to see you highlight the importance of selecting the right tour organiser and not to go after merely the amount of money they charge.
ReplyDeleteThank You Pradeep.
Delete